HypeSheet.com HypeSheet.com – Your Source for all that is Hype

While the price of big screen TV’s has dropped considerably they are still no match (size-wise) when it comes to a projector. For under $500 you can purchase a great projector that will give you a high quality picture and a screen size of up to 100 inches! For a couple hundred extra you can build a screen and hang you projector from your ceiling. Here we have outlined everything you should know before buying a projector; including how to build a screen, mount a projector on your ceiling, and some good projectors to consider.
Types of Projectors:
There are two mainstream types of projectors available of the commercial market right now, DLP and LCD. LCD is the same technology that has been around for decades and is used by your average flat panel TV now. LCD stands for Liquid Crystal Display and is essentially a bunch of electrically controlled pixels that change colors and a lit from behind to produce an image for the viewer on the other side. With an LCD projector, the light is very bright and the LCD is very small (<2 inches). DLP, or Digital Light Processing, is relies on microscopically small mirrors laid out on a semiconductor chip, known as a Digital Micromirror Device (DMD). These mirrors pitch to direct light toward or away from the projection area. Currently DLP technology is very popular because it is cheaper to produce.
Advantages and Disadvantages:
DLP: Since DLP chips direct light away instead of trying to block the light passing through, they are capable of extremely high contrast ratios at a relatively low cost. FYI – Contrast ratio is important if you want vivid colors and crisp, dark blacks; very few LCD projectors can match DLPs at high-brightness contrast. Single chip DLP projectors are also generally cheaper and can be made very small. DLP projectors are not perfect however, they require the DMD chip and a color wheel which spins at thousands of rotations per minute, all these moving parts equates to many points of failure. The color wheel also creates what is referred to as the rainbow effect, this is where some people observe a splitting of the color white into the three colors that make it up; red, green, and blue. There are some three chip DLP projectors available without a color wheel, but they are more expensive.
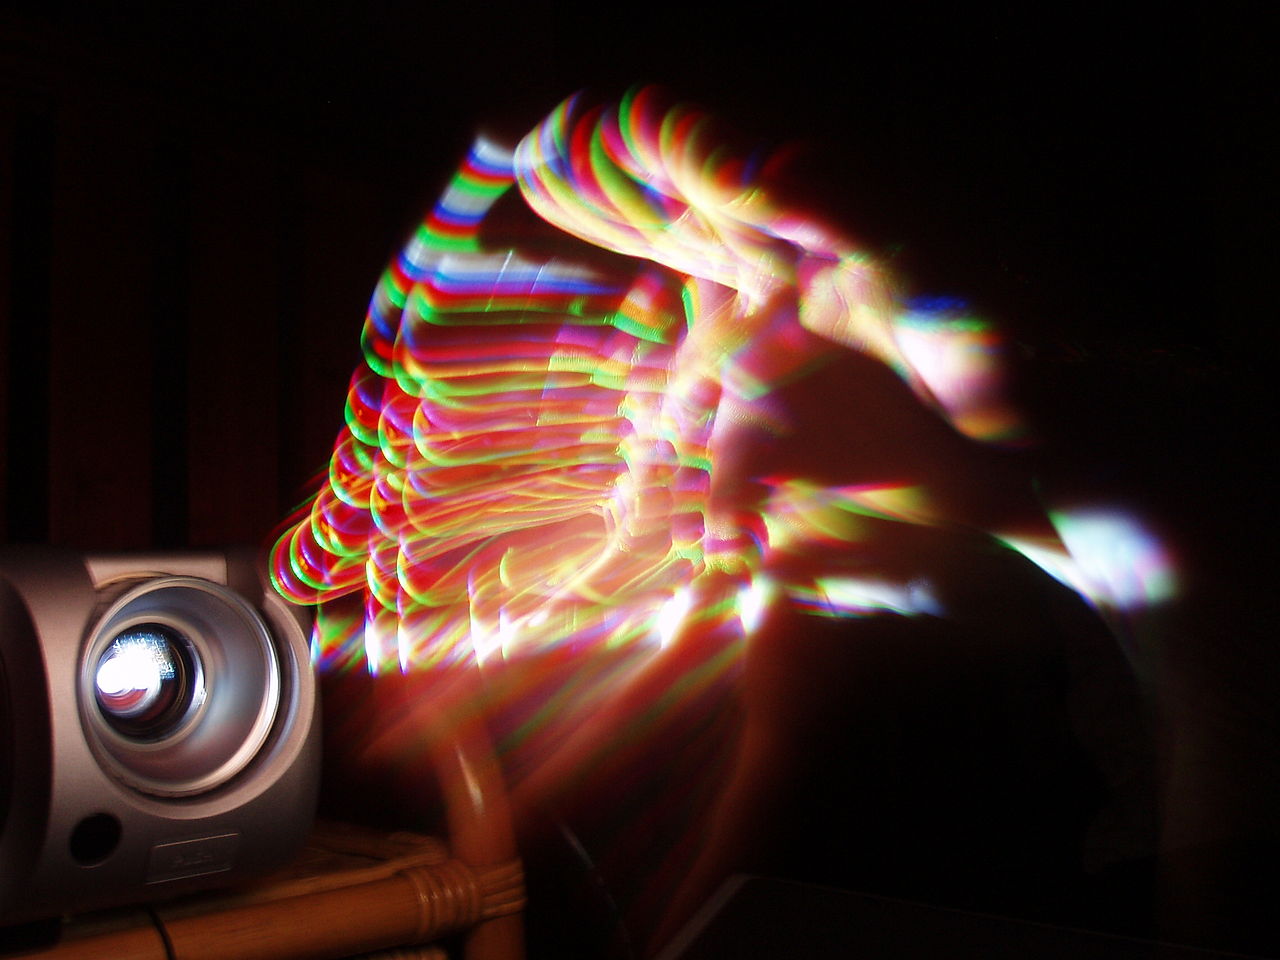
DLP Rainbow Effect
LCD: LCD technology has been around for a while, which means that it has been tried and tested. LCD does not have any moving parts and relies on fewer mechanical devices to produce the final image, thus it is technically more reliable. Single LCD projectors cannot produce the high contrast ratios seen in DLP technology and are usually only used as high brightness business projectors. Newer 3LCD projectors split up the colors (red, green, and blue) into individual panels and recombine the resulting image, this essentially triples the contrast ratio which results in darker blacks and more vivid colors.

Single LCD vs DLP
We recommend that you try to watch a movie on a DLP projector before considering one, that way you can see if you are one of the few people that can notice the “Rainbow Effect” before you settle on a technology.
Brightness:
Brightness is purpose dependent. If you have a lot of natural light coming in your home and you plan on watching during the day or you want a larger screen, go for more lumens. It is also good to mention that most projectors have two brightness modes: the full brightness (usually the advertised number of lumens) and the “eco” mode (a lower brightness setting designed to extend bulb life). If possible, find a projector that will output the brightness you need in its eco mode as this will extend the life of the bulb and the projector.
- 3000+ lumens: If you plan on going well over 100″ or you have a really bright home. (note: even the brightest projectors are useless in direct sunlight)
- 2200-2800: The sweet spot for brightness – good for low light conditions and not too bright where it will bother you at night.
- <1800 lumen: probably will not work for a 100″ screen, unless it is night time and you have all the lights turned off.
Your Options:
The staff at HypeSheet has had a chance to personally research and even test out a lot of projectors and here are the options we recommend:
For less that $500 these projectors are good options:

Epson 730HD
Key Features: 3000 Lumens, 720p HD, Very Good Contrast

Epson VS335W
Key Features: 2700 Lumens, 720p HD, Very Good Contrast, Cost Effective HD

Optoma H182X
Key Features: 3200 Lumens, 720p HD, Excellent Contrast, 3D ready
The Cream of the Crop:

Epson 5030UB
Key Features: 2400 Lumens, 1080P Full HD, Insane Contrast, 3D ready (includes rechargeable RF glasses), Wireless HD, whisper quiet
If your ready to setup your budget home theater here is what you will need (too keep it under $600 we are not including the cost of tools):
- Projector
- Ceiling Mount
- 2×2 lumber (pine ok)
- 1 Box of Screws
- Wood Glue
- Drywall Anchors
- Blackout Cloth / Projector Screen Material
- Staple gun
- Hammer
- Drill / Driver
- Drill / Driver Bits
- Optional 5.1 surround sound
Figure out your frame:
The size will depend on the purpose and brightness which we talked about earlier. We are assuming you want a 100″ (measured diagonally) screen for this write up. There is a nifty equation that some old math dude came up with called the Pythagorean theorem which says the sum of the square of the two adjacent sides of your screen will equal the square of the diagonal length.
So let D be the diagonal size (e.g., 100 inches), and let L1:L2 be the ratio (e.g., 16:9). Then we can say that the width and height are L1*x and L2*x respectively, where x is some number that we are supposed to find. Using Pythagorean theorem we can see that
![]()
then,
![]()
Using x you can find width and length as L1*x and L2*x respectively (the answer will be in the same units as you used for diagonal D, inches in our case). If you work out the numbers for 100″ screen you will get x = 100 / sqrt( 256 + 81) > x = 100 / sqrt (337 ) > x= 100 / 18.358 > x = 5.447 . So then the width of our screen will be 5.447 x 16, 87.1″ and our height will be 5.447 x 9, 49.0″, so about 87 x 49 ” screen.
Do the work:
Cut your frame from 2×2 oak or pine. Measure twice cut once. Glue and screw. Then wrap the screen materal around the back and remember to stetch it. Staple and hang!